Easy to Apply the Shaft Lean Decals to suit Your Preferred Shaft Lean Angle
How to Determine Your Preferred Shaft Lean Angle
The Shaft Lean Alignment System (SLAS) of Straightline Golf LLC allows you to set your Preferred Shaft Lean Angle for every club. Follow the instructions in the next section to attach the Shaft Lean Decal, Shaft Center Decal, and Club Face Decal. Once attached, follow these steps to set your desired shaft lean angle for each golf club to attach the Preferred Angle Decal.
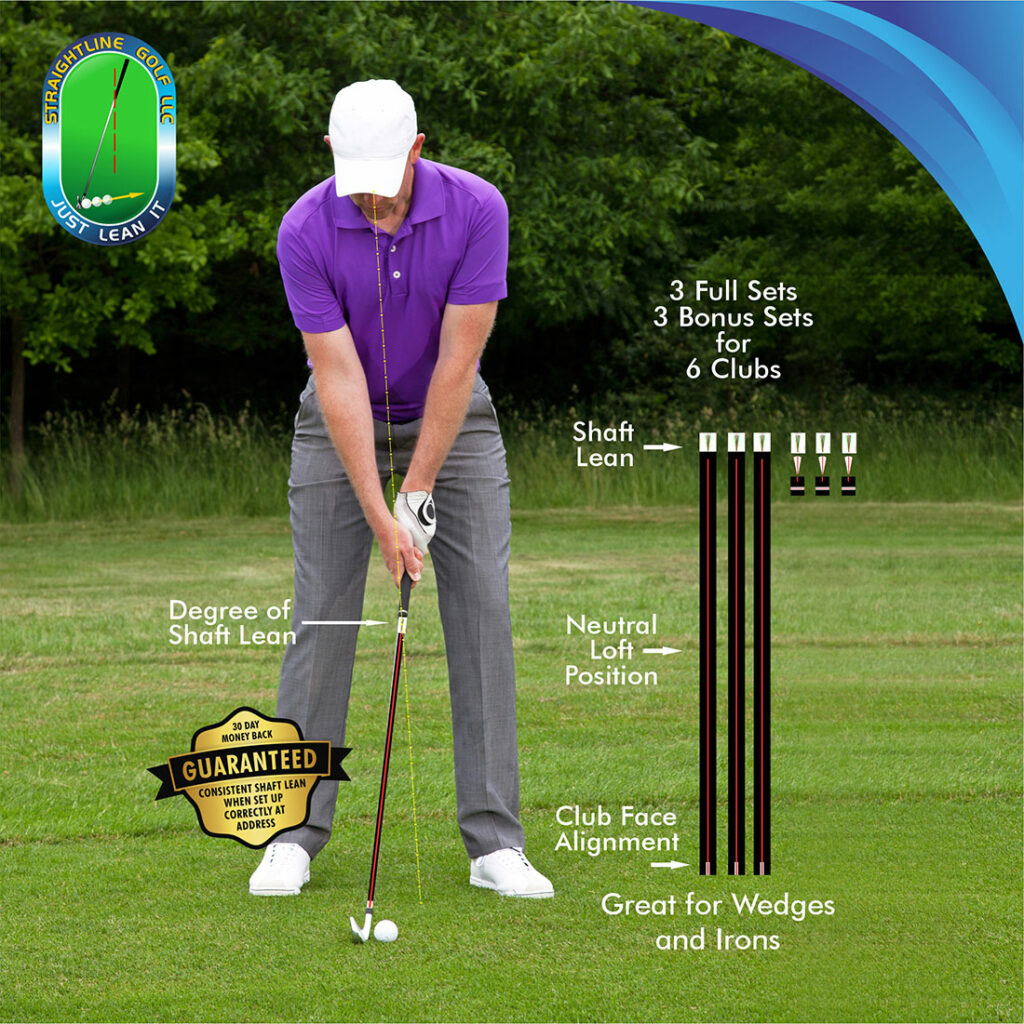
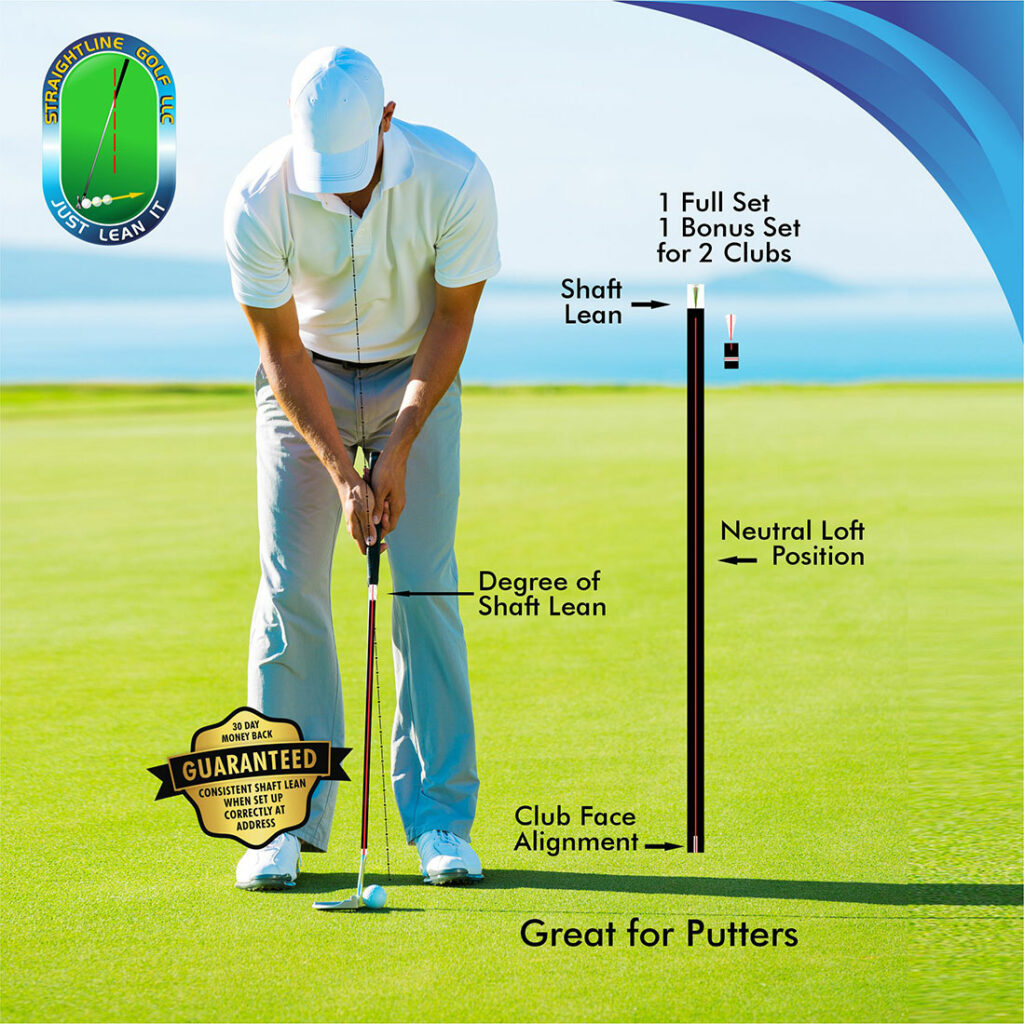
Setup properly (ball, feet & club) to achieve the correct address position for the specific club (neutral loft position).
Look down at the head of the club (white line on the diagram) to ensure you are square to the club face with the ball.
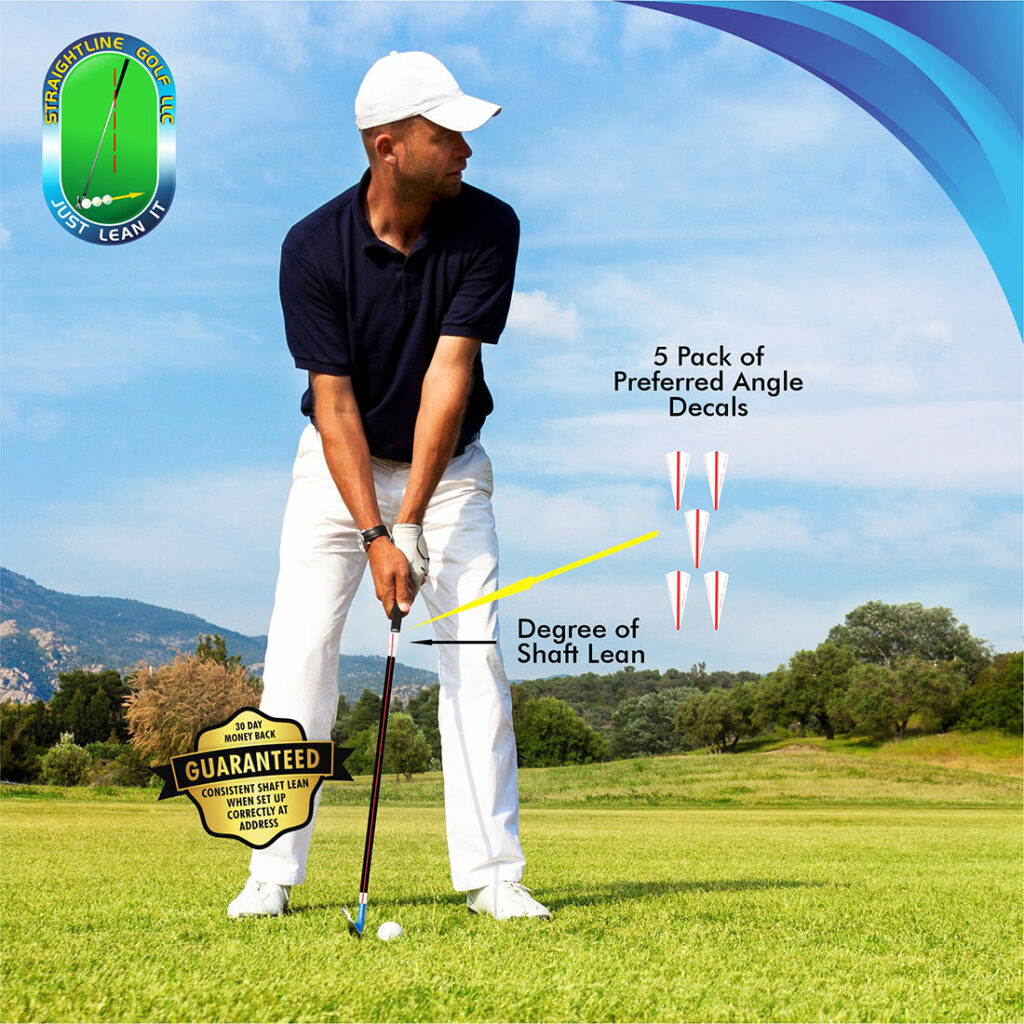
Without turning your head, lean the shaft slightly left or right for your desired shaft lean angle. The diagram shows a forward shaft lean (+ angle). Hold your club in that position and view (yellow line on the diagram) the colored angle lines (green, yellow, black, or red) on the Shaft Lean Decal just below the grip.
Look closely at the angle lines on the Shaft Lean Decal and choose the color you can look down completely. You should be able to look straight down a single-colored line the full length.
You are just using the colored line as a line of sight for your preferred shaft lean. Remember the line color you choose on the Shaft Lean Decal that represents your preferred shaft lean angle.
Take the Preferred Angle Decal and place it over the Shaft Lean Decal, aligning the red line on top of your preferred colored shaft lean line. Now you can use the single red line as your preferred shaft lean line.
If at any time you want to change your preferred shaft lean angle for any club, only replace the Preferred Angle Decal. Note: You are not allowed to change the Preferred Angle Decal while playing an official golf game.
You can also use the straight red line going down the shaft as a neutral loft position for clubs that you choose not to use a shaft lean on, such as a driver.
.
How To Apply the Decals of the Straighline Golf SLAS
The decals of the Shaft Lean Alignment System by Straighline Golf LLC are very easy to apply in minutes. It involves the following:
Clean the shaft where the decal/aid is to be placed and wipe it down with alcohol.
Measure the shaft length and cut the Shaft Center Decal 1 inch shorter.
Locate the TOP CENTER of the grip, be sure the grip has not turned on the shaft from being used over time. You can confirm the top center of the grip and shaft by placing the head of the club at a 90-degree angle. Mark the top center of the grip with a temporary small RED Line marking decals . Locate the TOP CENTER of the shaft near the hosel and mark it with a temporary small RED Line marking decal.
Apply the Shaft Lean Decal.
Apply the Shaft Center Decal.
Place the Club Face Decal (red and white) on the end of the shaft.
Determine and mark your Preferred Shaft Lean Angle as outlined above.
Attach the Preferred Angle Decal over the Shaft Lean Angle Decal.
* Be sure you keep your fingers clean with alcohol and dry completely so the decal will stick completely.
Download detailed instructions on the steps involved to apply the shaft alignment aid (decals) – click here.
For more information watch the video on “How to apply the Shaft Lean Alignment Aid to All your clubs.” This short video will show you the correct steps to apply the decals of the Shaft Lean Alignment System to your clubs. Take your time to ensure that the decals are positioned properly before pressing it onto the shaft.
Products
Special: Buy the 3 FULL SETS combo for 14 clubs for $89.99